It’s Time to shine! Beautiful hair is also important as a wedding guest! We’ll show you three hairstyles!
She said yes! Spring and summer are wedding seasons par excellence! It is warm, you can put on nice dresses and open sandals and put on a nice make-up. But what about the hair? Not only as a bride does one think about the perfect hairstyle, also as a guest one often does not know what to do with them.
I have made a tutorial for you with three hairstyles that work for both shoulder-length and long hair. Here is a step by step instruction for each hairstyle in addition to the video:
That’s what you need:
1 toupe comb
1 fine hairspray (for updos I use almost only Elnett yellow)
1 hairstyle loop, also called hairstyle loop or hairstyle help (gibt´s in the drugstore)
1 normal hairband (silicone rubbers provide a particularly firm hold)
1 small hairband
10 hairpins (I always take the wavy ones with rounded head, you don’t tear your hair out)
5-6 curly needles
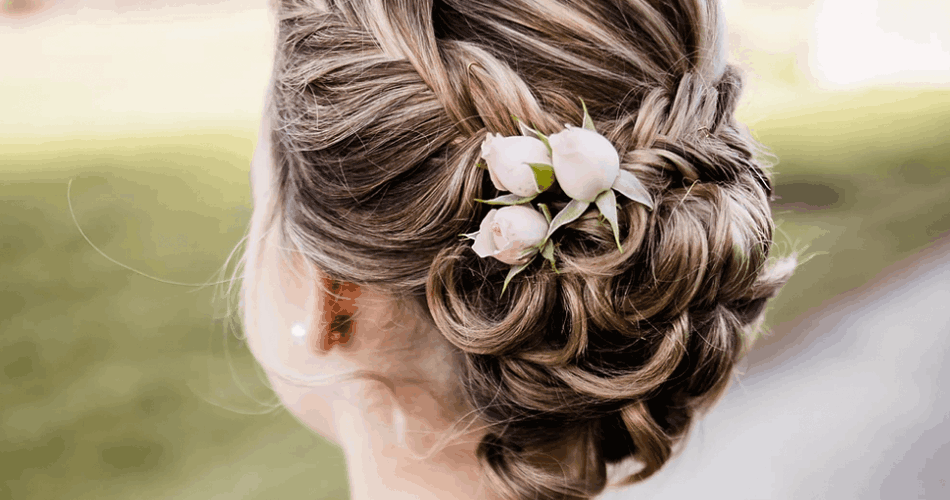
Hairstyle 1
Perfect for women who have straight hair and/or don’t want to let heat (curler, straightener etc.) onto their hair.
1) Brush hair thoroughly
2) For volume at the back of the head, separate three to four parts of hair parallel to the base and touch them individually.
3) Smooth hair properly and apply a light hair spray to the back of the head.
4) Straighten the hair from the left and right with the comb and make a deep, lateral plait with a hairband.
5) Take the handle of a hairstyle loop, split the plait in the middle and place it in the loop.
6) Pull the plait through the loop once and pull a few strands from the back of the head so that the volume remains.
7) Divide the smooth plait into three parts and braid to the top
8) Fasten the end with a small rubber
9) Lay the braided plait like a snail, pin it with hairpins and curls and pull it apart loosely.
10) To make the look even softer, pull a few strands of hair out of the hairstyle
11) Fix with hairspray
Hairstyle 2
A beautiful, semi-open variant that is easy to use and looks like a lot!
1) Divide hairs parallel to the ground into different parts and pick them up with a clamp
2) Curl from bottom to bottom with a medium thick curling iron
3) Pull the middle or side parting with your fingers or comb
4) For volume at the back of the head, separate three to four hair parts parallel to the base and touch them up.
5) Curl the remaining hair
6) At ear level cut a thick strand across the floor
7) Divide the strands into two parts and twist them against each other, always adding hair to one strand.
8) Arrived at the back of the head, don’t take any more hair, just cord it
9) Pin the knurled part
10) Do the same from the other side of the head and pin it also
11) Pull up a few strands of hair on the backcombed top of the head so that the volume remains.
12) Fix with hairspray
Hairstyle 3
A further development from Hairstyle 2, whereby the hair does not necessarily have to be curled beforehand!
1) All steps except curling (optional) like hairstyle two
2) Separate and twist single strands thickly
3) Hold and tighten the twisted strand at the end and pull one of the two strands so that the twist braid
widened
4) Turn and fix the finished strand like a snail
5) Do the same with the remaining hair and place strand by strand around the previous snail in different directions and pin with hairpins.
6) Dip curly needles across the head into the hair and push them in downwards.
7) Carefully pull the auger apart to loosen it up
8) Fix with hairspray